


How to Soar the Skies: A Complete Guide to Making Your Own Kite
There’s something magical about watching a kite dance across the sky, responding to invisible air currents and your subtle hand movements. I’ve been fascinated with kites since childhood, and I’m thrilled to share my passion with you today. Making your own kite isn’t just a craft project it’s your ticket to hours of outdoor adventure and a connection to a tradition that spans centuries and cultures worldwide.
When I created my first kite, I was amazed at how such simple materials could transform into something that actually flew! The joy I felt watching my creation take flight was absolutely priceless. Now, I want you to experience that same exhilarating feeling when your handmade kite catches the wind for the first time.
Essential Materials for Your Perfect Kite
Before we dive into the construction process, let’s gather everything we need. The beauty of kite making lies in its accessibility most materials are probably already hiding in your home or can be found at any craft store. I recommend collecting all supplies before starting to ensure a smooth, uninterrupted crafting experience.
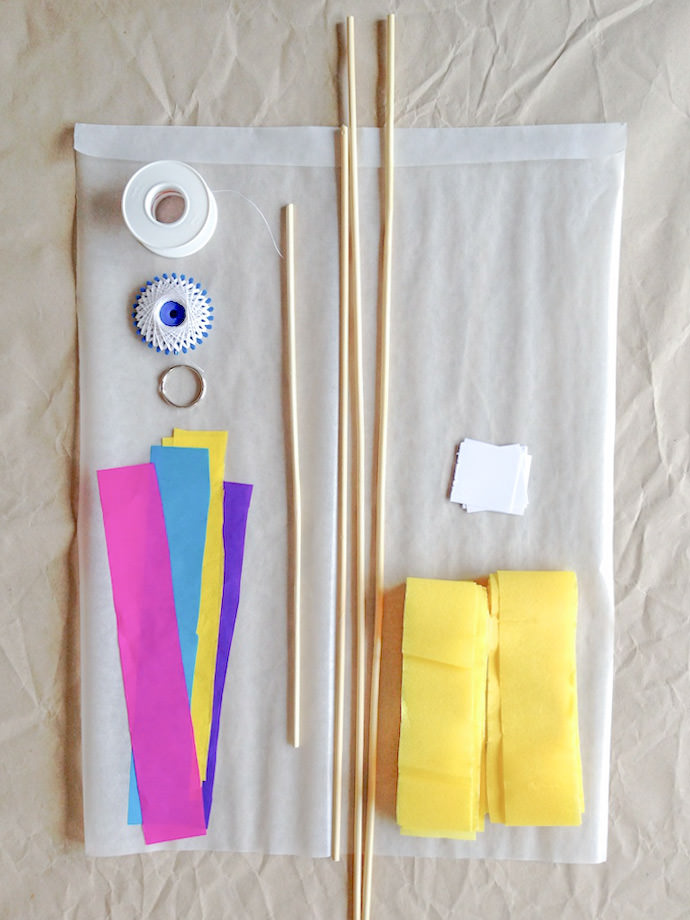
Here’s what you’ll need to create a classic diamond kite that’s guaranteed to soar high:
- Two wooden dowels (one 36″ and one 24″ for a standard-sized kite)
- Lightweight material (ripstop nylon, plastic sheeting, or even sturdy garbage bags)
- Strong string or fishing line for the bridle
- Kite string (at least 100 feet)
- Scissors
- Ruler or measuring tape
- Pencil
- Glue (white glue or hot glue gun)
- Colorful ribbon or lightweight fabric for the tail
- Electrical tape or duct tape
- Small saw (optional, for cutting dowels)
I always suggest investing in quality materials, especially for the kite covering and string. Remember, the success of your kite depends significantly on its weight-to-strength ratio. Lighter materials will help your kite catch even gentle breezes, while stronger connections will prevent disappointing mid-air breakages.
Understanding Kite Aerodynamics: The Science Behind Flight

Before putting scissor to material, it’s crucial to understand what makes a kite fly. This knowledge transformed my kite-making journey from frustrating failed attempts to consistent, spectacular flights. The fascinating interaction between four forces lift, gravity, drag, and tension determines whether your kite soars majestically or plummets disappointingly.
When wind travels over the surface of your kite, it creates areas of high and low pressure. This pressure difference generates lift, the upward force that fights against gravity. Meanwhile, the drag from air resistance pulls backward against the tension provided by your kite string. Finding the perfect balance between these forces is the key to stable flight.
| Force | Direction | Function | How to Optimize |
|---|---|---|---|
| Lift | Upward | Raises the kite | Proper kite angle and shape |
| Gravity | Downward | Pulls kite toward earth | Use lightweight materials |
| Drag | Backward | Stabilizes and slows kite | Add appropriate tail length |
| Tension | Forward | Controls kite position | Proper bridle adjustment |
I discovered through numerous flights that the bridle the string that connects your flying line to the kite is absolutely critical. Its adjustment determines your kite’s angle of attack to the wind, directly affecting lift generation. Too steep an angle increases drag and can cause your kite to spin; too shallow and it won’t catch enough wind to rise.
Step-by-Step Construction: Building Your Diamond Kite
Now comes the exciting part actually building your kite! I’ll guide you through each step of creating a classic diamond kite, the perfect design for beginners and experienced fliers alike. This timeless shape offers excellent stability and impressive height capabilities with relatively simple construction.
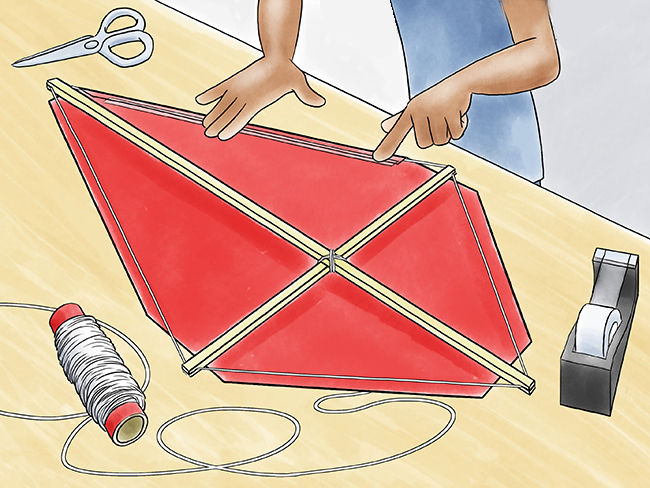
First, let’s prepare the frame. Take your longer dowel (36″) and make a small notch about half an inch from each end. These notches will hold your perimeter string in place. Then, find the exact center of this dowel and mark it clearly. Next, take your shorter dowel (24″) and create similar notches at each end. This crosspiece should be attached to the longer dowel about one-quarter of the way down from the top.
To create the essential bow in your crosspiece that gives your kite stability, gently bend the shorter dowel and secure a string between the notched ends, creating about a 2-inch curve. This bow should face the back of the kite. Use strong tape or twine to securely fasten the crosspiece to the longer dowel, forming a cross shape.
“The kite rises highest against the wind, not with it.” This ancient proverb reminds us that challenges often push us to reach our greatest heights in kite-making and in life.
Once your frame is ready, run string around the entire perimeter, connecting the notches you created earlier. Pull this string tight enough to maintain the frame’s shape but not so tight that it warps the dowels. This string outline defines the shape of your kite and provides a secure edge for attaching your covering material.
Covering Your Kite: Tips for a Wrinkle-Free Surface
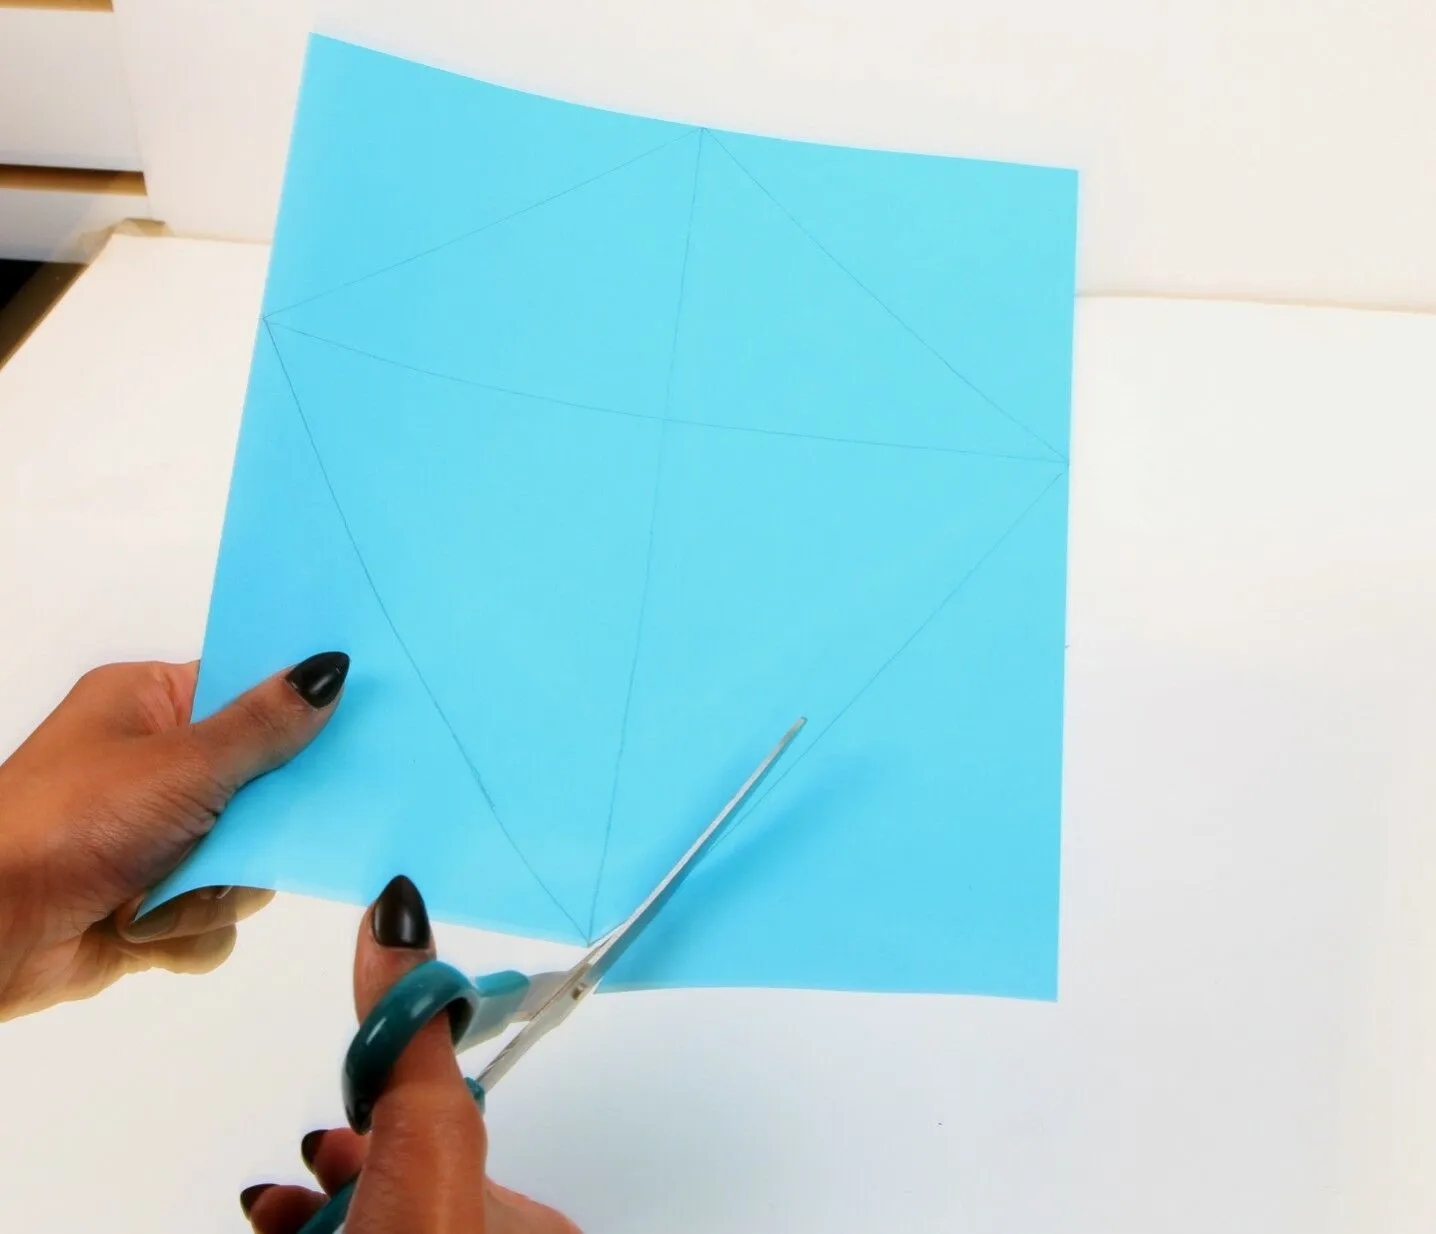
With your frame complete, it’s time to add the covering that will catch the wind. I’ve found that laying your frame on top of your chosen material and tracing around it with about a 1-inch margin works perfectly. Cut out this shape, then carefully fold the edges over the perimeter string and secure with glue or tape.
The biggest challenge I faced when covering my first kites was achieving a smooth, taut surface without wrinkles. Wrinkles disrupt airflow and can seriously impact your kite’s performance. I’ve developed a foolproof technique: start by securing the covering at the four points where the dowels meet the perimeter string. Then, working in sections, gradually attach the remaining edges, gently pulling the material tight as you go.
For plastic coverings, I recommend using tape along the entire perimeter for extra durability. For fabric coverings, a thin line of fabric glue works wonders. Allow plenty of drying time before attempting to fly your creation I learned this lesson the hard way when my hastily assembled kite came apart mid-flight!
Creating the Perfect Bridle and Tail
The bridle is your kite’s control system, and getting it right can make the difference between spectacular flight and frustrating crashes. For a diamond kite, I use a two-point bridle attached to the vertical dowel. First, tie one end of your bridle string to the point where the dowels cross. Then, measure a length about three times the distance between this cross point and the bottom of your kite. Tie the other end of the bridle to the bottom of the vertical dowel.
Next, find the sweet spot on your bridle string typically about 1/3 of the way down from the top attachment point and tie a small loop here. This loop, called the tow point, is where you’ll attach your flying line. The exact position may need adjustment based on wind conditions and your kite’s specific characteristics.
Now for the tail a crucial element for stability that also adds visual appeal. Here’s my proven formula for tail length:
- For light winds (5-10 mph): Tail should be approximately 6-7 times the height of your kite
- For moderate winds (10-15 mph): Tail should be 4-5 times the kite height
- For stronger winds (15-20 mph): Tail should be 3-4 times the kite height
I prefer making tails from lightweight ribbon or strips of plastic, with small bows or lightweight decorations tied along its length at regular intervals. These not only look fantastic against the sky but also add crucial drag to prevent spinning.
Best Flying Conditions: When and Where to Launch
Finding the perfect conditions for your maiden flight can dramatically improve your chances of success. Through years of kite-flying adventures, I’ve identified the ideal circumstances for a triumphant first launch. Open spaces are absolutely essential parks, beaches, or large fields without nearby trees or power lines offer the cleanest wind patterns.
Wind speed is another critical factor. For beginners, I recommend winds between 5-15 mph strong enough to lift your kite but not so powerful that control becomes difficult. You can judge wind speed without special equipment: if leaves are rustling and you can feel gentle but consistent pressure against your face, conditions are likely perfect.
The time of day matters too. I’ve found that mid-morning and late afternoon typically offer the most consistent winds. Midday can bring thermal currents that create unpredictable conditions, while early morning and evening often have too little wind for sustained flight.
Remember to check the weather forecast before heading out. Approaching storm fronts or rapid temperature changes can create volatile conditions that might damage your handcrafted kite. Safety should always be your priority never fly near airports, during thunderstorms, or in crowded areas.
Launching Techniques for Successful Flight
The moment of truth has arrived it’s time to launch your creation! I still remember the flutter of excitement I felt before my first successful launch. With the right technique, you’ll experience the incredible satisfaction of watching your handmade kite climb steadily into the blue.
For solo launching, position yourself with your back to the wind and hold your kite up high in front of you. Let out about 20-30 feet of line, ensuring it’s free from tangles. When you feel a steady breeze, gently release the kite and take a few steps backward, paying out line as the kite rises. Avoid the common mistake of running this creates artificial wind that disappears when you stop, potentially causing your kite to crash.
If you have a helper, the process becomes even easier. Have them hold the kite about 50 feet upwind from you while you maintain control of the line. On your signal, they should release the kite as you gently pull the line taut. This method almost guarantees a successful launch in proper wind conditions.
Once airborne, the key is gentle, responsive line management. Pay out line gradually as your kite climbs, maintaining just enough tension to keep it stable. Too much tension can pull the nose up too far, causing stalling; too little allows the kite to flop and potentially dive. With practice, you’ll develop an intuitive feel for exactly what your kite needs.
Troubleshooting Common Kite Problems
Even perfectly constructed kites can encounter challenges during flight. Drawing from my many years of experience, I’ve compiled solutions for the most common issues. When your kite dives repeatedly to one side, check for asymmetry in your frame or covering. Often, a slight adjustment to the bridle can correct this problem move the tow point toward the side to which the kite is diving.
If your kite refuses to rise despite adequate wind, your bridle point likely needs adjustment. Try moving the tow point slightly higher on the bridle string to increase the angle of attack. Conversely, if your kite keeps stalling and falling backward, move the tow point lower to decrease this angle.
For kites that spin in circles, the tail is usually the culprit. Add more tail length or weight to increase drag and stabilize your flight. Remember that different wind conditions may require different tail configurations I often carry extra tail materials to make adjustments on the field.
Structural issues like bent frames or torn coverings should be repaired before attempting further flights. I’ve found that carrying a small repair kit including tape, extra string, and scissors allows me to fix minor problems without ending the day’s flying session prematurely.
With these troubleshooting techniques and a bit of patience, you’ll overcome initial challenges and soon be enjoying spectacular flights with your handmade kite. The learning process is part of the adventure, and each adjustment brings you closer to kite flying mastery.